How to create a SonarQube report?
March 1, 2024
Si quieres exportar informes de los resultados de los análisis de los proyectos de SonarQube, estas en el artículo adecuado. A continuación, te vamos a explicar paso por paso cómo puedes generar estos informes.
Step 1: Download the Report Plugin for SonarQube
To get started you will have to download the Report Plugin for SonarQube through this link. In case you don’t know it, it’s our product that allows you to automatically generate reports of SonarQube projects.
We remind you that you have a free 14-day trial to see how it works. We also have this same product for SonarQube, which you can download through [this link](/sonarcloud-report
On the other hand, we leave here the installation instructions. You will see that it is very simple to complete this step.
Step 2: Generate reports
Once you have finished the installation process you will be able to see your first reports.
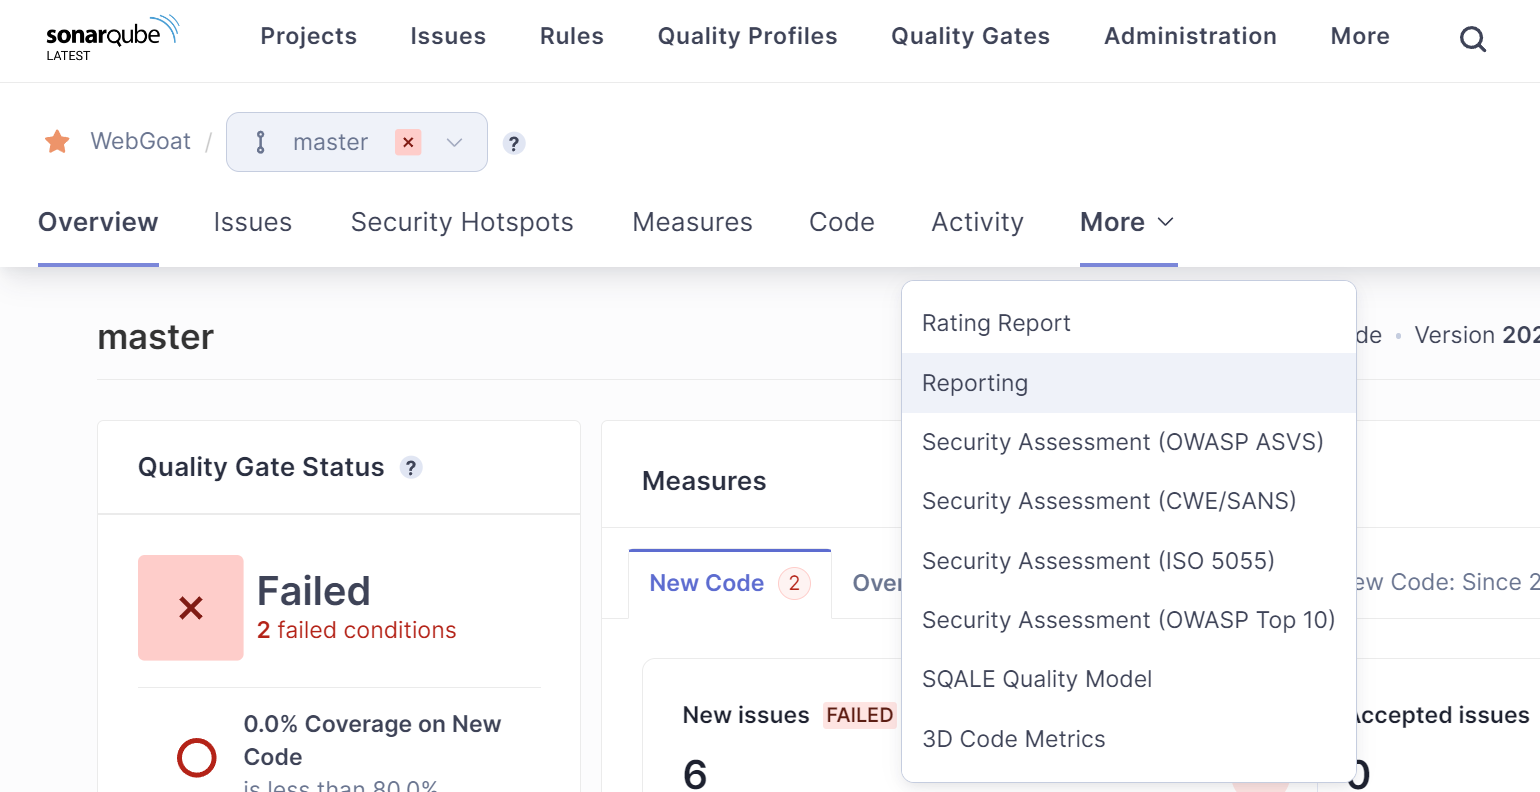
Access any project you want. In this example we will see below, we access the project called WebGoat and click on More > Reporting (this will appear when we have installed the Report Plugin for SonarQube).

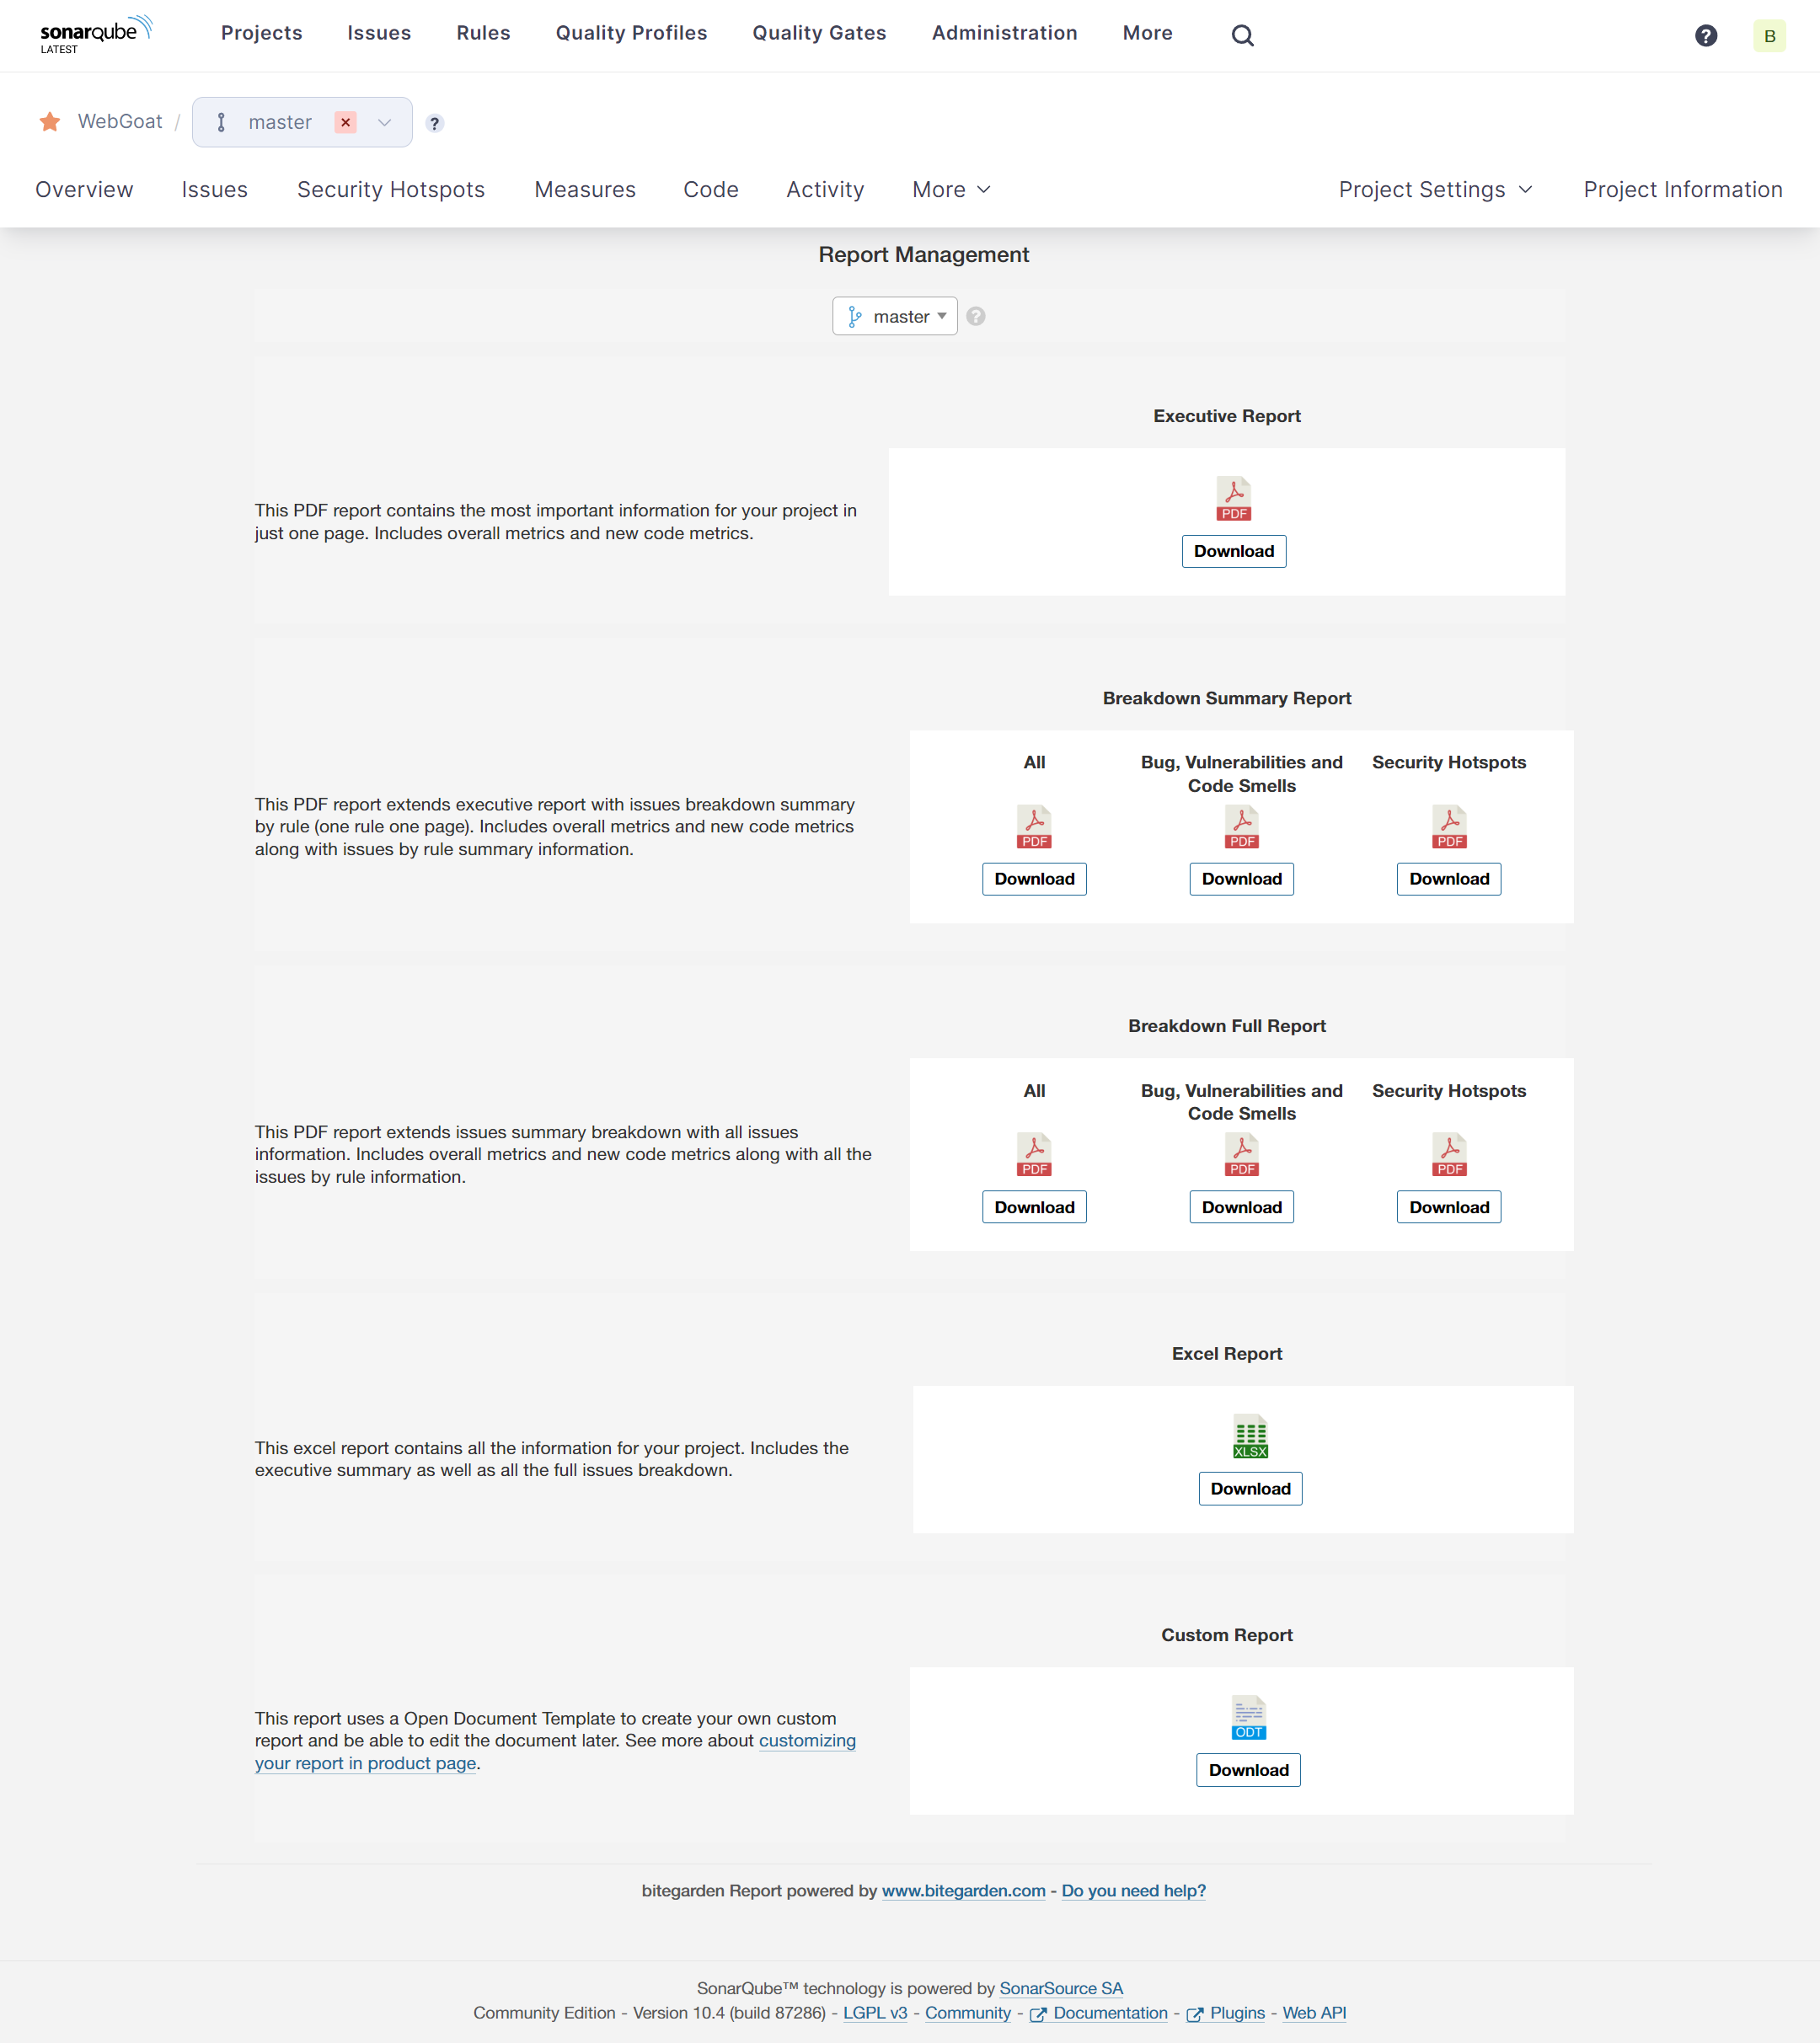
In the next screen you will see that you have generated reports in PDF, ODT and Excel, ready for download.

In addition, since release 2.19 the Report Plugin for SonarQube includes reports with only information of Bugs, Vulnerabilities and Code Smells, and other information about HotSpots.
Step 3: Generate reports
Each report generated has a button, so you only have to click on the button you want to download your reports.
Process video tutorial
To make it clearer, the following video shows how you can create these SonarQube reports and export them in PDF, editable ODT template and/or Excel.
By the way, we have available an offer of 20% discount for the Premium Pack bitegarden, which includes all products for SonarQube or SonarCloud. You can take advantage of this offer through the product download page.
bitegarden team
Helping companies to develop better software